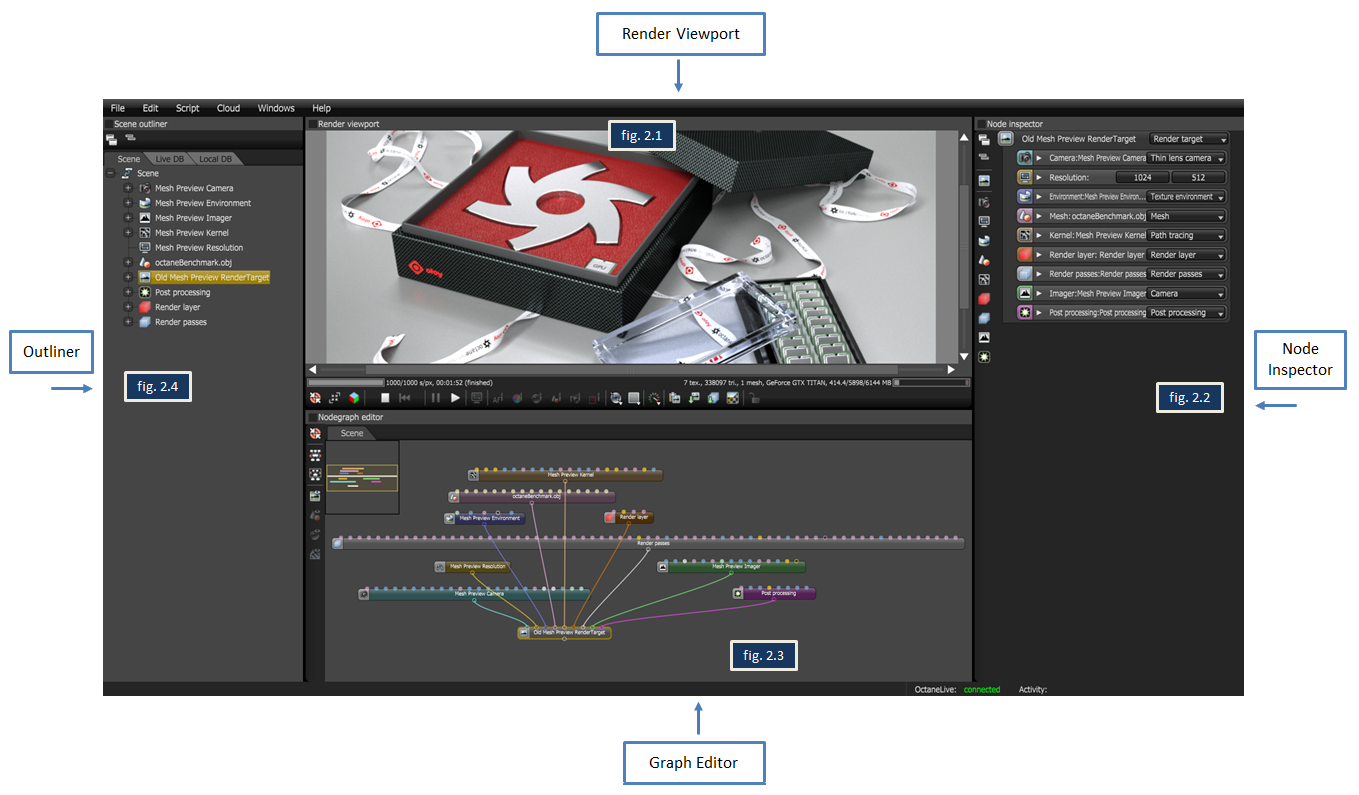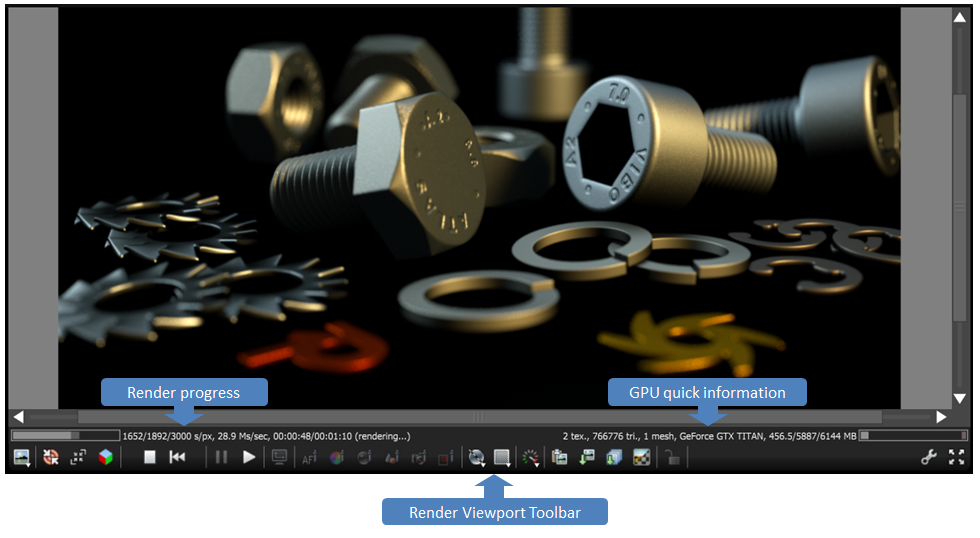
Render Viewport (fig. 2.1)
The render is constantly updated in the Render Viewport. The scene can be navigated in real-time. Adjustments to materials, lights and camera can be made and viewed interactively.
Node Inspector (fig. 2.2)
The Node Inspector allows the user to make changes to the various settings in the scene, lighting and material nodes.
Graph Editor (fig. 2.3)
The scene and materials are represented by nodes in OctaneRender™. This allows for powerful material editing as well. Don’t be scared. If you don’t know how to use nodes because great renders can still be produced without needing to use them.
Scene Outliner (fig. 2.4)
The Outliner allows the user to see an overview of all the elements in the scene and also allows them to use the local and online node databases.


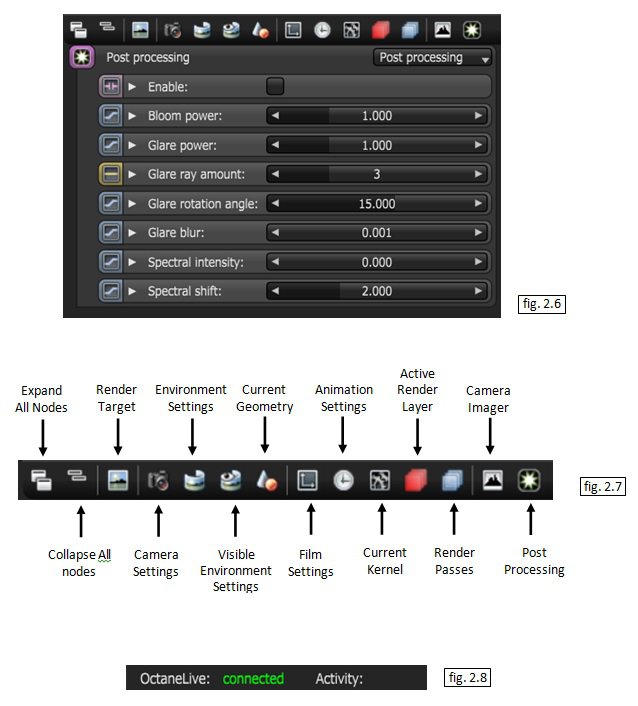
The Node Inspector (fig. 2.6) is used to make changes to nearly every aspect of the render / scene in OctaneRender™. Nodes that are selected in the Graph Editor are displayed in the Node Inspector where their values can be adjusted or changed. When using the Material Picker, the currently selected material will also be displayed in the Node Inspector. To reduce the clutter, this pane also provides a compact view of uncollapsed node pins.
The Node Inspector also includes quick buttons (fig. 2.7) that allow the user to quickly jump to the most commonly used nodes (RenderTarget, Camera, Resolution, Environment, Imager, Kernel, and Current Mesh). It also has context menus allowing to copy, paste, and fill empty node pins.
The bottom of the Node Inspector window hosts the status for both the OctaneLive and Online status. (fig. 2.8)

